
Nakashima Dining Table pt 2 – Work on the stretcher and feet
It’s been a while since the last update on this project. Having many projects going at the same time inevitably means a few of them move at a slower pace than I would like. Still, we have finished renovating one more room in our house, so I am back to working on the table a bit more frequently these days. Let’s see what’s new.
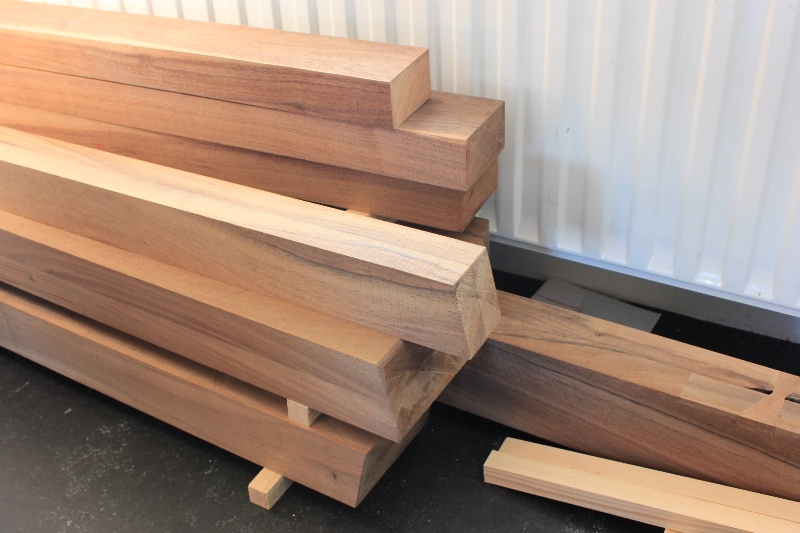
Last time, I finished preparing the stock for the cleats. Today, it was time to work on the lower stretcher and feet. The first photo below shows the way things were before I started. The stretcher is on the foreground. The photo on the right shows a close-up of one of the ends of the stretcher, showing two issues that needed work. It is clear from the photo that the stretcher (as is true with most pieces that make up the frame) is a lamination of two parts. Each part was a little problematic at that end. One of the parts was marred on the top side by an errant saw cut (you can see the diagonal lines where the saw blade went deeper than we wanted, most likely because the piece shifted slightly as it was being ripped to size), making that side a little shorter than it needs to be. The other part has a chunk missing, mostly likely a loose branch or knot that came off during ripping to size. Each problem was fixed with a patch. I removed a rectangular piece from the lower part in the photo and glued a patch in. I tried to match the grain direction and colours as much as I could, but you can still see a seam. I am pretty confident that after the last few passes with a smoothing plane and after oiling the patch will be less obvious.


The second issue, the missing knot/branch needed a somewhat different treatment. Structurally, I don’t imagine there was any concern. I just needed to pretty things up a bit (now, you might argue that the outcome is no prettier than what it was, but that’s another story). Onto the stage comes the first butterfly key of this project. Butterfly keys, frequently seen in Nakashima’s work, are used to prevent seams (checks) in wood from opening up further. In this case, as I have little worry the lamination will come apart, the butterfly key was used to close up the gap visually and attract attention away from the other patch. We’ll see whether that works out in the end. In the three photos below you can see the opening cut with saw and chisel (left), the oversize plug inserted and glued (centre), and then planed flush to the three sides (right).


Finally, I worked on the feet. I had two (laminated) pieces cut oversize that I need to rip (twice per piece to be symmetrical to the seam) and then planed and cut to length (and at the correct, 14˚ angle). Frankly, I should have had the pieces ripped to size by Robert, rather than sawing them by hand, but I suppose it’s good practice with the handsaw. In the end, the two pieces (on the left, below) were surfaced and are now ready for joinery layout. You can see one of them on the top of the foreground pile (on the right, below). That’s something for another part in this series.

Next time, I will be working either on laying out and cutting the joinery for the frame or on surfacing the tabletop pieces. See you then.
-Tassos
Previous parts in this series
Looking good!
Thanks to your blog and efforts I decided to resume work on my table as well…
I’ve brought the two slabs that I will use for the tabletop from the garage to the inside of the house to acclimate for a couple weeks before I will start working with them.
That’s great to hear, Alex! Will you be writing about it on a blog?
Tassos
Tassos, FYI, I sent you a note to your work email.
Alex
Hi Tassos,
hope your doing well.
How is your dining table coming along? Any plans to finish it soon.
Enjoy the upcoming holidays
Alex